I believe the new player experience is crucial to growing the local community.
At Elite4 Games, our local Pokemon League is a place where everyone can come hang out and play the Pokemon TCG in a more casual manner. I’ve talked about how great it is to play in person in my previous post here and I want to add on to that. I believe that the best way to learn the Pokemon TCG is by playing properly competitive decks right from the get-go! So I like to build decks that anyone can play at our League for FREE regardless of skill level. And while you’re here, I’m always happy to teach, backseat or just observe. Everyone learns in different ways and what’s really cool about Pokemon is that there are so many different strategies and ways to play & build your decks. Follow along while I take you on a long-winded journey through the 6 decks I’ve built and how to play them!
Dragapult ex: Difficulty – 2/5
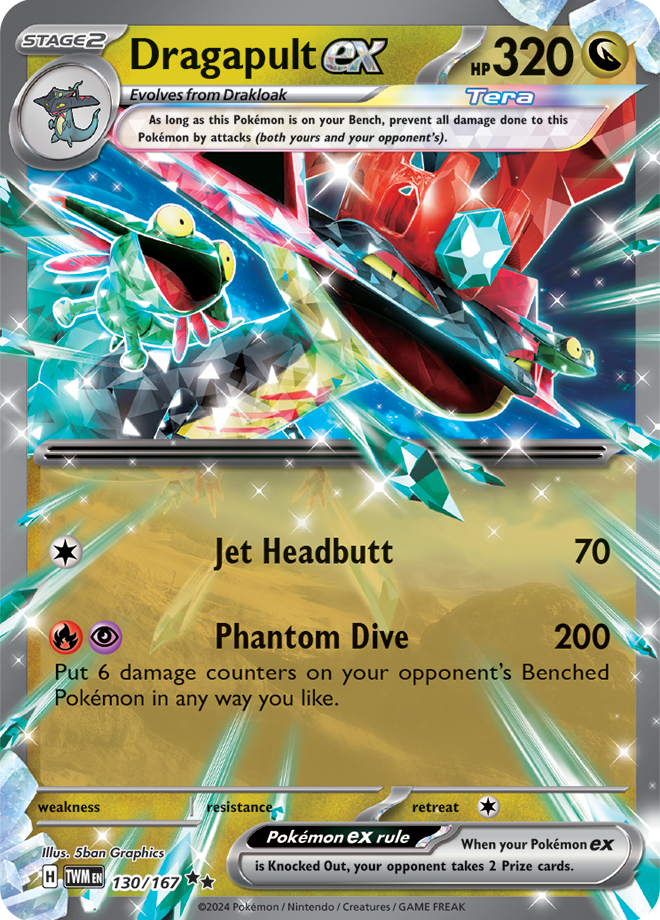 <<< Click on the card for the full deck list! Have this open while reading the next section.
Dragapult does what every deck wishes it could do – apply pressure every turn. While you aren’t getting the ginormous KO’s on big 300+ HP Pokemon in one hit, you are threatening every single Pokemon on your opponent’s field every turn of the game. Dragapult itself deals 200 damage and places 6 damage counters (60 damage) spread out among your opponent’s benched Pokemon in any way you’d like. This can KO small basic Pokemon or soften up larger Pokemon for a KO next turn. This attack also notably goes through bench protection effects like those native to Tera Pokemon or applied by Manaphy. Couple that with Dusknoir’s ability to apply an additional 130 damage and all of a sudden you have a lethal amount of damage. 130 + 200 can KO almost any Pokemon in the game but if you add in Radiant Alakazam’s ability to move 2 more damage counters, you’re able to find a bench KO on any support Pokemon. Take Fezandipiti ex for example: a Pokemon with 210 HP. Dusknoir’s 130 + Alakazam’s 20 + Dragapult’s 60 gives you a perfect 210. Plus you’re still dealing 200 damage to the active Pokemon!
The set up for this deck is fairly simple. Get your Dreepy’s on board turn 1 and try to get Dragapult attacking on turn 2. You typically want to be going first with this deck so you can evolve your Dreepy as quickly as possible. But you don’t live and die on the opening coin flip by any means. Going second means you have access to your supporters, primarily Arven. That gives you even better chances of getting your Dreepy on the field! There’s also a good number of support Pokemon to help you achieve this goal. Rotom to draw 3 cards at the end of your turn and become a target for the almighty Forest Seal Stone which lets you search your deck for any card. Lumineon searches your deck for any Supporter (and is also a stone candidate). Fezandipiti draws 3 cards the turn after one of your Pokemon is KO’d by the opponent. Fezandipiti isn’t helpful on the first turn since nobody’s attacked yet, so keep that in your hand if you draw it until you can use it’s effect! Lastly, Tatsugiri can help you find a supporter without committing a 2-prizer like Lumineon V. Click Here to see a standard Turn 1 end board.
The rest of the cards help you actually win the game. Crispin grabs you the energy you need to attack with Dragapult, Sparkling Crystal lets you attack with Dragapult for only 1 energy and Thorton can be a sneaky way to get your Dragapult back if you lose it early. When you play Thorton you can swap a basic Pokemon on your field for one in the discard pile and if the original Pokemon was in play before your turn started, you can immediately evolve the new Pokemon! So for example, you play Lumineon V to get set up at the beginning of the game. A couple turns go by and your Dragapult is knocked out. Then you play Thorton to swap your Lumineon for a Dreepy and immediately evolve it into Dragapult! BOOM! It’s like you’re playing Yu-Gi-Oh.
Roaring Moon: Difficulty – 3/5
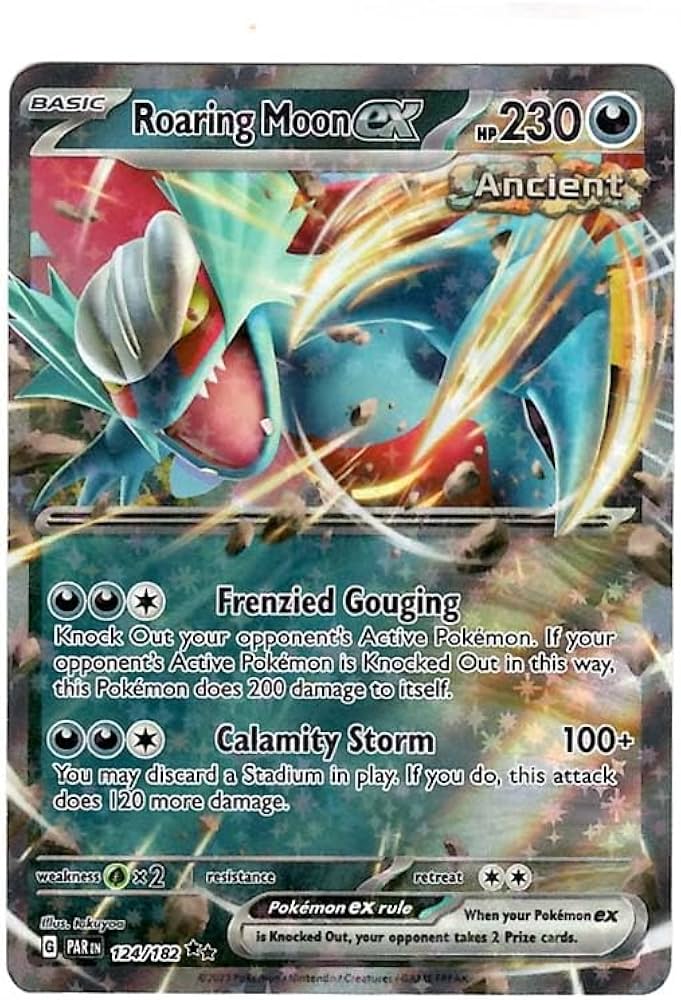 <<< Click on the card for the full deck list! Have this open while reading the next section.
This deck is almost completely unchanged from the previous iteration! The only difference is the addition of the new fighting type Koraidon as a tertiary attacker. Koraidon helps against Pokemon weak to fighting like Terapagos and Miraidon. Being able to KO them without endangering your Roaring Moon ex. Outside of that, I’ll copy over what I wrote previously so you don’t have to bounce between different posts.
You are attacking every turn and the game only lasts 5 turns – whether you win or not. You want to go second when playing this build because you want to attack with Roaring Moon ex or the “baby” Roaring Moon on your first turn. And this deck is designed to do just that! Your first turn will involve having a Roaring Moon on the bench, getting it powered up with a combination of Dark Patch, Professor Sada’s Vitality and/or your manual energy attachment from hand. Couple that with Pecharunt ex’s ability to switch your fully powered Roaring Moon into the active position and you have a one-way ticket to Knock Out City! Radiant Greninja discards an energy and lets you draw 2 more cards while Squawkabilly ex exists to discard your whole hand and draw 6. Get your energy in the discard pile, accelerate them to Roaring Moon with Dark Patch & Sada, KO any Pokemon your opponent has active. Note: If your opponent wins the beginning coin flip and makes you go first, stick to the same plan of powering up Roaring Moon but instead of moving it to the active position, try to get Flutter Mane there instead to shut down any abilities your opponent’s active Pokemon may have. Click Here to see a standard Turn 1 board.
There’s A LOT to do on your first turn and not a whole lot to do on subsequent turns. You want to keep your conga line of Ancient lizards running and just keep throwing them at your opponent. You will overwhelm them with Roaring Moon ex’s ability to KO anything in the game while getting them fully powered with (ideally) minimal effort. This deck plays a slew of supporting Pokemon such as Fezandipiti (to draw cards when your Moon gets knocked out), Lumineon (for the same Arven + Forest Seal Stone combo to find any card combination in your deck) and Morpeko as a free retreat/pivot in between turns or with Pecharunt’s ability. So long as you have Pecharunt, you won’t be stalled out! The rest of your deck is outfitted with cards that either draw more cards or search for more useful cards. Ultra Ball & Ancient Vessel discard cards (energy) from your hand to search for more resources while simultaneously putting energy cards in the discard pile for Dark Patch & Professor Sada. PokeStop discards 3 cards from the top of your deck – or lets you add them to your hand if they’re items. So you can end up drawing 3 cards for free!
Roaring Moon doesn’t really have a “late game”. By Turn 3 you should have KO’d 2 of your opponent’s Pokemon. Or you’re probably going to lose… It is by all means a glass cannon. Cause more devestation in the early game than your opponent can handle and snowball from there. You play 1 Prime Catcher which lets you select your victim for the turn. Use this wisely to disrupt your opponent’s set up on turn 1 or 2. If you still have it available after that, you should be using it to clean up the last 2 prizes of the game by bringing up a benched 2-prizer. You also have Boss’s Orders for this purpose though, so don’t feel the need to hold on to the Prime Catcher. Prioritize it’s use in KOing the most vital piece to your opponent’s strategy.
Palkia / Dusknoir: Difficulty – 4/5
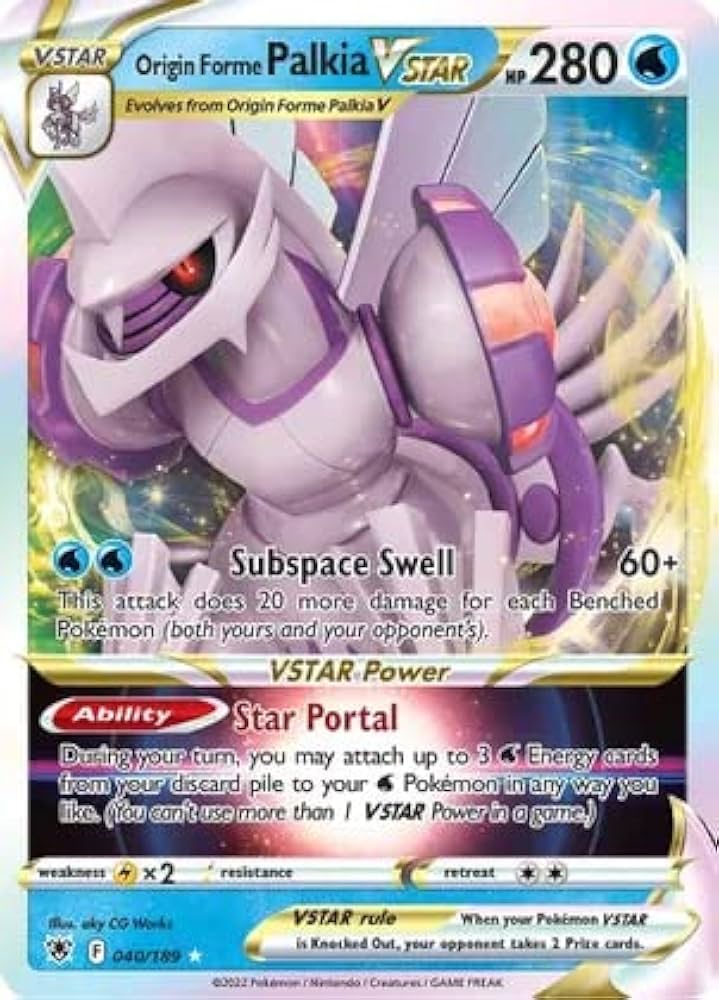
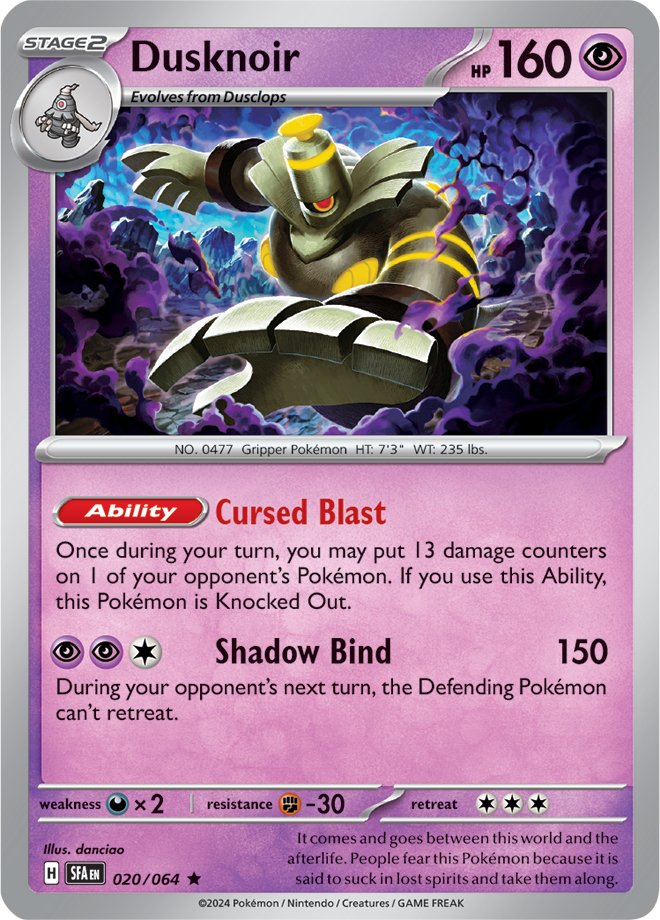 <<< Click on either of the cards for the full deck list!
This deck plays very similarly game-by-game but it requires a good amount of foresight. It’s not as simple as “get set up and attack” as your game time decisions will be influenced by what your opponent is doing. The overall concept of this deck is to use Dusknoir’s ability to place 13 damage counters on a Pokemon to give you a positive prize trade. In order for this to work, you need a single prize attacker that can pressure your opponent enough to make them want to knock it out. Enter Radiant Greninja. It’s a hybrid support Pokemon/attacker that gives you card draw AND huge damage potential when paired with Dusknoir. This combination will allow you to KO Pokemon with 220 or less HP, as well as stage 2 decks that rely on small basic Pokemon. Manaphy is less popular these days due to the influence of Dusknoir and Dragapult in the current meta, but if one does get placed down on the opposite side of the field you can still KO benched Pokemon once Dusknoir Cursed Blasts it to the shadow realm.
Your typical first turn is fairly straightforward - with room for deviation. The key pieces you’re hunting for are Duskull and Palkia V. Because both of these Pokemon need to evolve in order to be useful, it’s paramount that you get them onto your field as soon as possible. Because your turn 1 set up is so important, I recommend playing aggressively when possible and using Squawkabilly’s Squawk and Seize ability to draw a fresh 6 cards. NOTE: Do NOT discard multiple copies of Rare Candy or Night Stretcher. You will need them in the late game to recycle your Dusknoir. Discarding 1 copy of each is fine, but if your hand is cluttered with multiple copies of the same card, do not discard it! Palkia Vstar’s Star Portal ability lets you attach 3 water energy from your discard pile to itself or Radiant Greninja. 9 times out of 10, you want the energy on Greninja. The only exception being if you were unable to manually attach a water energy the previous turn AND your opponent has a big HP Pokemon staring you down. In that specific circumstance, you’ll be Star Portal-ing to Palkia itself. As for those deviations I mentioned earlier, let me introduce you to Klefki.When Klefki is in the active position, it shuts off the abilities of ALL Basic Pokemon. Decks that rely on Teal Mask Ogerpon like Raging Bolt & Regidrago get absolutely walled by this thing. It also blocks other useful abilities like Radiant Greninja’s Concealed Cards, Squawkabilly’s Squawk and Seize and Miraidon’s Tandem Unit. So if you have a bad start or you know your opponent relies on these abilities, ending your turn with Klefki active can be absolutely devastating for your opponent. Klefki locks your opponent in a room full of bombs.
I’ve covered the early game so let’s talk about the rest of the game. My list plays disruption because it’s designed to function mostly by itself without the need for heavy draw support. Since you’re expecting to detonate multiple Dusknoir in a game, you give up temporary prize advantage. Meaning you can use Counter Catcher in combination with another supporter. Judge by itself is a fantastic disruption card - especially when paired with Klefki. But you can’t sleep on Roxanne. Once you surrender 3 prizes to your opponent (which is honestly pretty easy with so many Dusknoir), you set them to just 3 cards to play with at the start of their turn. And after taking so many blasts, they’re gunna be running out of gas real quick. Use your night stretchers and rare candies to keep the pressure on and be prepared to end the game with a big Palkia or Ursaluna attack.
I’ll briefly go over the rest of the card selections and why I’m playing them in this list.
- Fezandipiti - draws you cards later in the game. Also only has 1 retreat cost so you can retreat it if you start with it. It takes your attachment for turn but you can recycle the energy with Palkia later so it’s not that consequential
- Earthen Vessel - searches for energies. Discard one with Greninja, attach the other one. Super simple and a no-brainer to include
- Hisuian Heavy Ball - There’s a good number of 1-of basics in this deck and sometimes you prize one you need (Greninja, Squawkabilly, Klefki). Heavy Ball gets it for you
- Prime Catcher - it’s the best ace spec. The 3rd gust effect in the deck and another switch!
- Switch - Get your Ursaluna and Palkia back to the bench. Also searchable off of Iridia if you’re in a bind. Also retrievable off of Pokestop for utility and card advantage.
- Pokestop - There’s a lot of items in this deck and you get to bump more advantageous stadiums for your opponent.
- Powerglass - attach this to Radiant Greninja and it ends the turn with 2 energy attached to it instead of 1. Then you can fire off another crippling Moonlight Shuriken for the second turn in a row. It’s a win-more card and the lowest priority card in the deck. It forces your opponent to KO Greninja and thus ruins their prize mapping.
- Surfer - Another switch card. This one is usable even under item lock and lets you draw cards if your hand is low. It’s a nice little bit of utility that you sometimes end up needing.
Lost Zone: Difficulty – 5/5
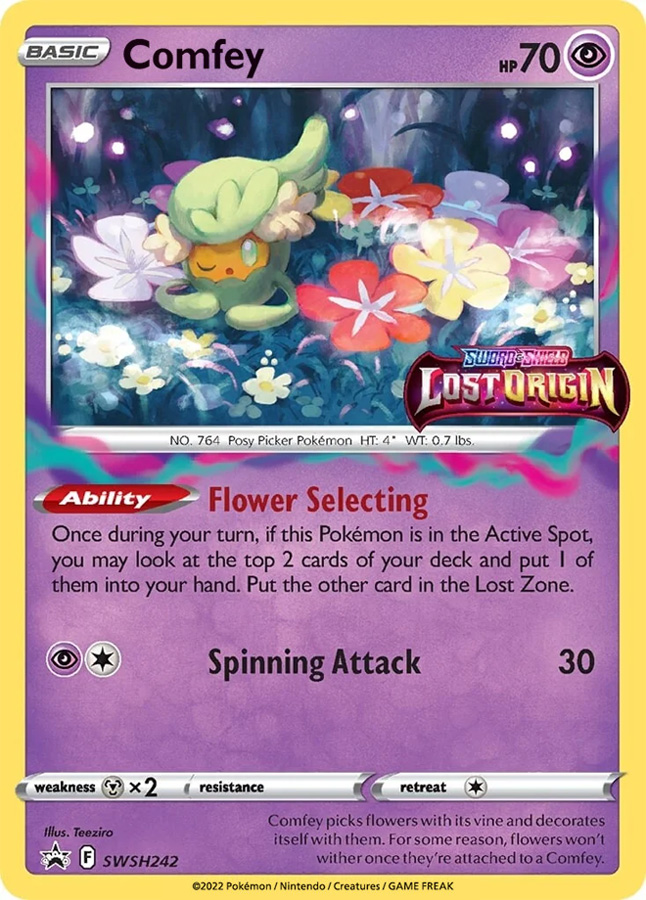 <<< Click on the card for the full deck list! Have this open while reading the next section.
If you love resource management, Lost Zone is the deck for you! Every single little interaction you make with this deck is a give & take. Comfey lets you draw 2 cards but you must banish one of them to the Lost Zone. Use this effect on each of your Comfey and throw in a Colress’ Experiment to reach your magic Lost Zone numbers. With 4 cards in the Lost Zone you can use Cramorant’s attack for no energy cost. 7 cards lets you use the strongest energy acceleration tool in the meta: Mirage Gate and 10 abandoned cards unlocks Sabeleye’s Lost Mine attack which lets you place 12 damage counters (deal 120 spread damage) to any of your opponent’s Pokemon in any way you want. The main win condition though is getting 7 cards into the Lost Zone as quickly as possible so you can Mirage Gate to power up your high-energy cost Pokemon like Terapagos and Iron Hands. Click Here to see a standard Turn 1 board.
Your first turn is dedicated to getting cards in your lost zone. Comfey must be in the active position in order to use it’s Flower Selecting ability so you play a lot of switch cards along with Latias ex to give your basic Pokemon (all of them) free retreat. From there, you need to decide which of your attackers you’ll be using. Against big basic Pokemon you’ll want to use Terapagos to prevent all damage to it. Iron Hands will take an additional prize when it scores a KO with it’s Amp You Very Much attack so it’s your ideal candidate to power up when facing a deck that relies on a lot of small HP Pokemon. Black Kyurem does a really good job of neutralizing 2 of the best decks in the format; Dragapult & Regidrago. This deck has a lot of versatility and you can always end things off with a Lost Mine from Sableye.
The real difficulty with this deck comes from managing all of your resources. It may sound silly when you’re just looking at the deck list, but keeping track of the location of each of your energy cards is a skill that can only come with practice. There are 5 places an energy card can be: Your hand, attached to a Pokemon, your discard pile, your deck and your prizes. During your first search of the game you NEED to prize check. You need to know which cards are in your prizes because you will be choosing which card(s) to add to your hand and which cards to send to the Lost Zone. Once they’re in the Lost Zone, they’re never coming back so it’s critical that you don’t banish the wrong thing! Here’s a quick guide to prize checking. If you follow this order you should be good, just remember that this takes a lot of practice. Try to do it while only looking through your deck 3 times.
- First check: Comfey, Legacy Energy, Lightning, Water, Grass, Psychic
- Second check: Mirage Gate, Colress, Sableye, Cramorant, Latias
- Third check: Greninja, Iron Hands, Terapagos, Switch, Switch Cart, Boss, Roxanne
Are they in the deck? Are they in your hand? If not, they’re in your prizes!
Blissey / Pikachu: Difficulty – 2/5
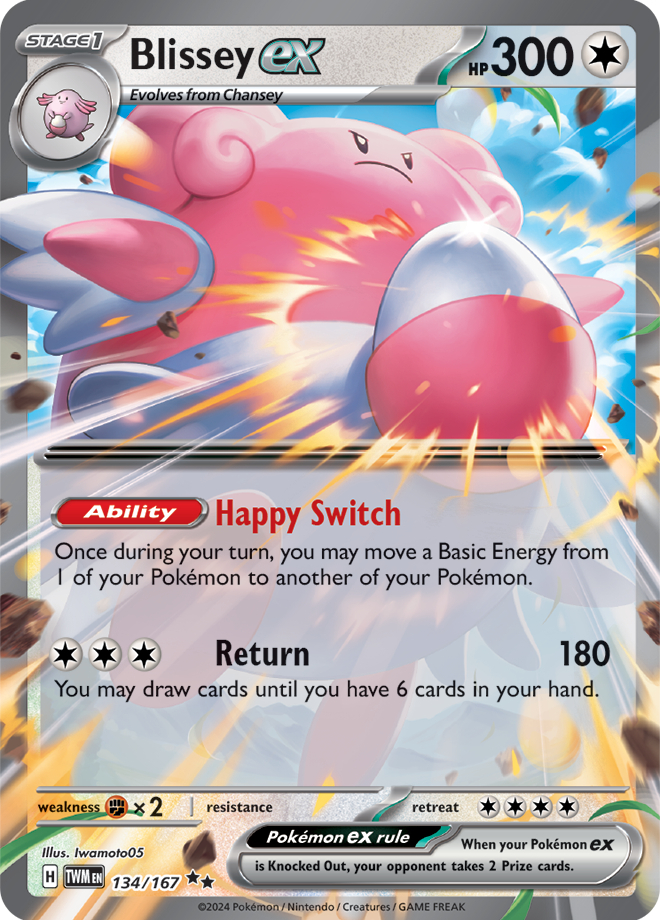
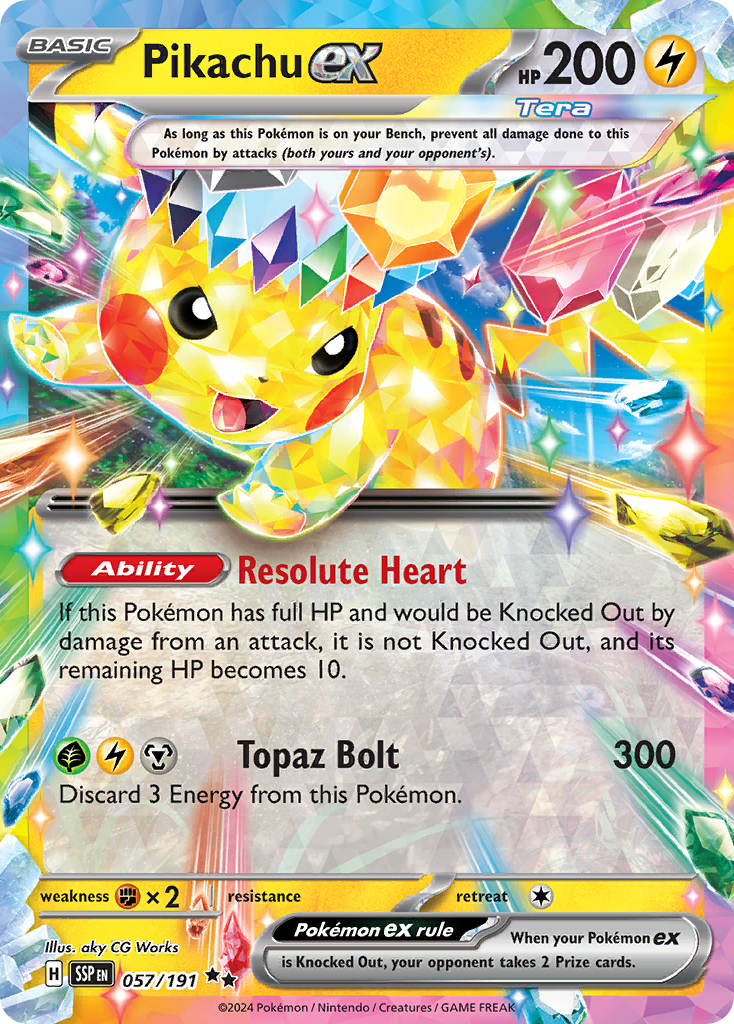 <<< Click on either of the cards for the full deck list!
This deck is very interesting. The concept of it is pretty simple – use a combination of Glass Trumpet and Blissey ex to recycle energy discarded from Pikachu’s Topaz Bolt attack. Pikachu deals 300 damage and with Gravity Mountain can usually KO every Pokemon in the format. Pikachu’s ability allows it survive a hit as well so you want to gain tempo and prize advantage by attacking with Pikachu twice. You also have Raikou and Iron Hands as secondary attackers as well as Blissey. You usually don’t want to attack with Blissey because you don’t want it active but if you do, you get the benefit of also drawing cards. The most crucial piece in this deck is the Precious Trolley. It’ll let you play all of the basic Pokemon that you need. Usually 2 Chansey, a Pikachu and whatever else you need. Click Here to see a standard Turn 1 board.
Let’s talk about the support Pokemon. Take a look at the decklist and it might feel a little barren. You have Squawkabilly as your lone draw card and it’s only usable on your first turn. But au contraire, you’re missing a little 30HP lightning bug there. Joltik is absolutely nuts. For 1 colorless energy this little guy puts FOUR energy into play. And they’re all relevant! There isn’t even a limitation to who you can attach the energy to. 4 energies wherever you want. That’s insane. If he’s prized, you’re going to go for the turbo discard playstyle. Get energy in the discard pile and Glass Trumpet them onto your Chanseys. When they evolve they move the energy onto your Pikachu or Iron Hands.
The worst case scenario with this deck is not getting your Chanseys into play. This deck will live and die off of Blissey being able to sponge up energies and move them around. That’s why there’s 3 Nest Balls, 4 Ultra Balls, the Precious Trolley and 4 Arven. You need 2 Blissey in play. If you do not have them You. Will. Lose. Iron Hands is for taking out the small HP guys, Raikou is a reliable attacker that can hit for up to 220 damage for little energy investment and Munkidori is +30 damage after Pikachu gets hit. Because Pikachu and Blissey can survive almost any hit in the game, Munkidori has a use! It’s usually not a high priorty but it does let you win the Pikachu war if you’re against another Pikachu deck. Aside from that, we play recursion to keep our Pokemon healthy and allow the conga line of energy to keep finding their way to the Pokemon mascot.
Hydreigon: Difficulty – 3/5
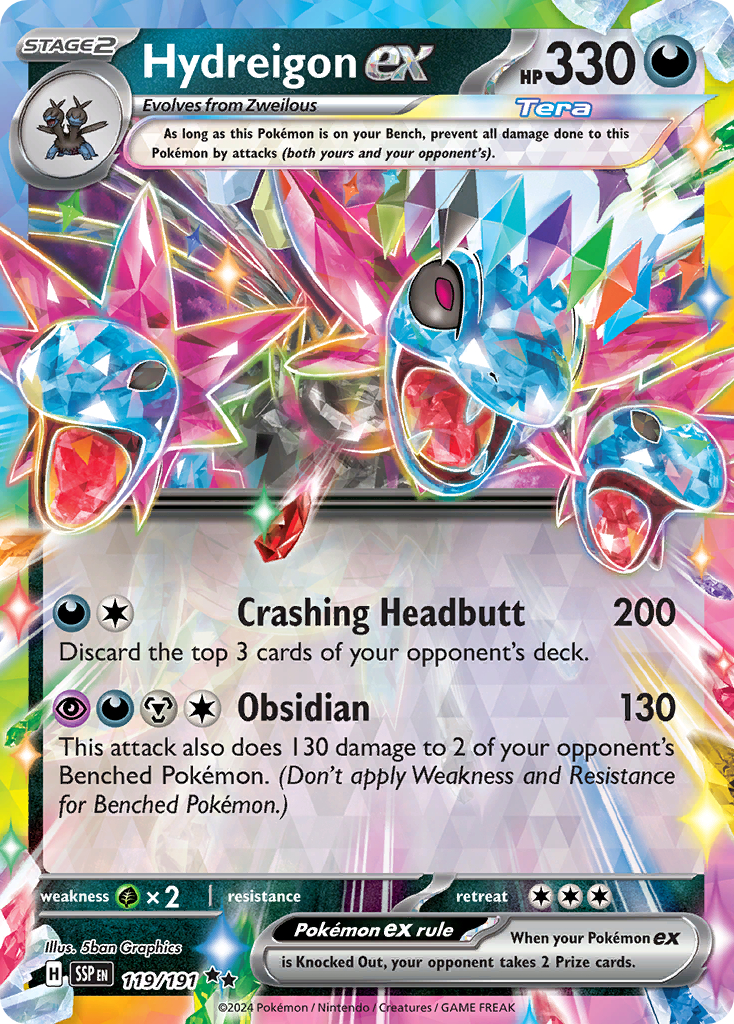 <<< Click on the card for the full deck list! Have this open while reading the next section.
Hydreigon doesn’t do anything incredibly well. But it does a couple of things to an acceptable degree. It’s definitely the overall weakest deck of the lineup, but it’s really fun! And it still wins games. The first attack does 200 damage and mills 3 cards from your opponent’s deck. It’s fine. The second attack does 130 damage 3 times. Once to the active and once to two different benched pokemon. In terms of damage economy, it’s the best attack in the game. You deal 390 damage. And that would be really really good if Tera Pokemon weren’t immune to bench damage. Against a Charizard deck, this thing is absolutely insane. You punch Charizard for 200 and maybe discard their Super Rod so they can’t play the game anymore then the next turn you hit it for 130 damage (knocking it out) and cleaning up 2 little guys on the bench. Now that’s the best case scenario. The average case scenario is that you survive in the game long enough for the mill 3 effect to be relevant. Which, you know, still works. You just have to work for it. This is a blue collar deck if I’ve ever seen one. You gotta put the work in.
So let’s talk about the early game. You need cards. A lot of them. There’s no one card combo in this deck so buckle up. I’m going to walk you through this whole thing. Try not to deviate. Turn 1: you need Deino and Pidgey on the bench. If they’re not on the bench going into your next turn, you probably lose. That’s just the way it is. Play your Poffins, play your Nest Balls. Get Rotom (going first) or Cleffa (going second) out there and draw cards to end your turn. Oh right, make sure you attach an energy to Deino. If you don’t, you probably lose. Turn 2: Tree Tree Tree Tree Tree. You need to pretend like it’s Christmas morning and get those presents under the Grand Tree. You probably can’t read the itty bitty text on Grand Tree so let me summarize it for you: “If you prize checked last turn, select a basic Pokemon on your bench and evolve it into it’s Stage 1 then Stage 2 form straight from your deck.” Typically you want to evolve into Pidgeot first because it lets you Quick Search for any card remaining in your deck. Usually the second piece of your Hydreigon evolution (Rare Candy or Hydreigon itself). But if you can Rare Candy into Pidgeot first, do that. Then Quick Search for the Tree. Same end result. If Tree is prized, you probably lose. Click Here to see a standard Turn 1 board.
The final piece of the Hydreigon puzzle is getting 4 energy onto it. And this may come as a shock to you, but if you don’t get enough energy onto it… You probably lose. Luckily we play some cards to help mitigate that issue. Dark Patch to move a Dark Energy from the discard pile to a benched Deino/Hydreigon. Counter Gain to get rid that pesky colorless energy requirement and let you attack for 1 less energy (assuming you’re down in prizes but let’s be honest, you’re playing Hydreigon so you probably are). Crispin lets you attach an extra energy and searches for 2 of them. And if you whiff the extra draw from Rotom or Cleffa, you can use Turbo Energize to attach 2 energy from your deck. If you’re super high rolling and you’ve got the extra Deino, you can evolve into the regular Hydreigon which discards the top 3 cards of your deck and attaches any energy it mills to whatever Pokemon you want… Attach it to Hydreigon ex. Or you probably lose… Is what I WOULD say if it weren’t for the last addition to the deck –
Roaring Moon ex baby! I love this guy! Sometimes you just don’t get the Hydreigon ex up and you don’t want to lose. So what do you do? Throw caution to the wind and Frenzied Gouging whatever’s on Roaring Moon’s dinner plate. This guy is the least picky eater in the entire world. He will chow down on anything your opponent puts in front of him. And that WILL buy you enough time to get a Hydreigon ex set up. Roaring Moon is so much of a threat that you can ignore half of this entire deck breakdown if you want to. But if you’re doing that.. Just like… Just play the Roaring Moon deck. Scroll up.
 <<< Like before, click the Play! Pokemon logo to find our League on Pokemon’s website!
I’ve crafted these decks to be able to actually compete with any other top meta deck being played by other people. So right from the get-go you’re playing a full and proper game of the Pokemon Trading Card Game. And that’s really cool. So please, I implore you, even if you’re brand new to the game come play Pokemon at your local League here at Elite4 Games. It’s free and you’re going to have a blast!


